
In my weekly newsletter I often give a brief summary of my processing of the the raw image file. Read the newsletter for any amount of time, though, and you’ll quickly see that my edits are often similar across images. While I limit the amount of detail in the newsletter, I thought I would further explain my most common edits here.
Why do you edit anyway?
Shouldn’t you just get it “right” in camera? Isn’t any editing “manipulation”?
The short answer: I edit to overcome the limitations of the camera and to take control of the decisions the camera would otherwise make for you in terms of color, contrast, etc.
The slightly longer answer: Any time you take a photo, especially with a digital camera producing a jpeg file, the camera is making a lot of decisions for you. What is white, what is black? How much contrast to add, etc. Even when you shoot in manual and control such things as aperture and shutter speed, the camera is making many choices (and you can often change these in the camera, but then you’re just pre-editing/guessing in the camera).
Furthermore, shooting in a raw file format – a must for any serious photographer – leaves the file very flat-looking as it’s not applying any edits or filters automatically. However, the raw file contains a lot more information that allows you to make those decisions later.
By editing the photo afterwards, you can master the file and make sure it truly captures the scene as you intended. Can you push it too far? Absolutely. Can you manipulate it with more advanced techniques such as adding or removing items? Yes. I won’t say how much editing is too much. For myself, my goal is to accurately capture the feeling of being there with a realistic portrayal of the subject. If I were to take significant liberty with a photo, it would be disclosed.
In the end, to each their own. I won’t fault a photographer for pushing the limits of their art, as long as it’s not passed off as something it wasn’t. Even Ansel Adams spent hours in the darkroom dodging, burning, and mastering his prints. Today’s digital darkroom is just the evolution of that process.
Why Lightroom?
Nearly all my editing is conducted in Lightroom, and 100 percent of my photo organizing is done in Lightroom. From time to time, I may bring a photo into Photoshop or another plugin for a specific edit that is beyond Lightroom’s ability, but even then, that process is managed through Lightroom, which allows you to export into another program and then re-import the updated file seamlessly.
Specifically, I use Lightroom Classic as part of the Adobe Creative Cloud, not to be confused with Lightroom CC. The latter is oriented for mobile, while Classic is the desktop version. Read more on Adobe’s blog.
Photoshop is the software most often associated with photo editing, even being used to describe any photo that has been edited, often with a heavy hand (“that image has clearly been Photoshopped”). However, it’s not a great program for editing a lot of photos quickly, nor does it offer any organization ability. While software options are a better topic for another post entirely, in short, Lightroom offers streamlined editing, organizing, and sharing abilities. Furthermore, editing done in Lightroom is nondestructive, meaning your original file is left intact. All edits are done to a preview file, and only upon export does it apply the edits to make a new file. This means you can always return the original file as a starting point, something I’ve done in the past when I’ve wished to apply a different style or a new feature in Lightroom to the image.
There are many other options out there, with more popping up all the time, such as Capture One Pro, Skylum Luminar, and others. I haven’t used them enough to offer an opinion, but with the internet, you can find no shortage of reviews and opinions on them :).
Standard Lightroom Adjustments
Ok, with all of that out of the way, here are the most common edits I make in Lightroom.
- Color balance. I let the camera use auto white balance when shooting, because when shooting in Raw this is one adjustment that can be made later with no negative effects. At least with my camera, the camera often interprets the scene as “cooler” (i.e. more blue tones) than was the case in reality, so I often “warm-up” the scene to remove/reduce the blue tone.
- Lens correction. All lenses have some distortion and/or vignetting (light drop off near the edges). Lightroom has built in profiles for many lenses that will correct for these (or you can do it manually). While I don’t always apply a correction, I most often do for wide-angle shots where it is more pronounced.
- Noise correction. Noise (i.e. that grainy look you sometimes see in photos) is most often a result of higher ISO’s, which are often necessary in lower light and/or when you need a faster shutter speed. On some images with an ISO of 400, and on any image with an ISO of 800 or higher, I’ll apply noise reduction. The higher the ISO, the more I apply, but rarely more than 40 or so – the trade-off with noise reduction is a softer, less sharp image, so the new two must be balanced.
- Exposure. My goal in the field is to get the exposure correct or as close to correct as possible given the conditions. Sometimes I’ll need to adjust the exposure slider, which works differently here than in the field. A one-stop increase in exposure in the field is not quite the same as a one-stop increase in exposure in Lightroom. In Lightroom, the adjustment has a greater impact on mid tones as it tries not to make the brightest part of the photo even brighter and possibly “blow out” (i.e. making it pure white with no detail) bright spots.
- Highlights and Shadows. Rather than using the exposure slider, more often, I find myself using the highlight and shadow adjustments to make more fine-tuned adjustments. This often means decreasing the highlights (to make the brightest parts a little less bright) and increasing the shadows (to make the darker parts a little less dark). (I sometimes use adjustment brushes and even more fine-tuned adjustments, but those are specific to a photo and not a standard edit I use on most photos.) Highlight reduction can easily go all the way to -100 with many of my images and commonly ranges in the -50 to -80 range for me. Shadow increases often range from 20 to 40 with it rarely going above 60 (above 60, the shadow areas often suffer from too much noise, at least with my camera’s files).
- Whites and Blacks. While adjusting highlights and shadows often evens out the exposure enough to provide adequate detail in the brighter and darker areas of the photo, to ensure adequate contrast and dynamic range, I turn to the black and white sliders. These set the brightest and darkest values in the photo and I often decrease the blacks until the histogram is bumping up against the left side and increase the whites until the histogram is bumping up against the right side. In practice, this often translates to blacks being approximately set to -10 and whites +20.
With these edits, I rarely need to use the contrast slider, which I feel is too blunt of a tool. I may make edits directly to the tone curve, but not frequently enough to consider it one of my standard edits. - Texture, Clarity, and Vibrance. These tools often the give the photo that something extra, but be careful: while a little can be good, a little more can look unnatural. Texture and clarity are similar in that they add localized contrast and sharpness, yet behave in slightly different ways. I often set one or both to approximately +10. Vibrance impacts colors but does so with a lighter touch than saturation, and I often bump vibrance +10 as well. (Saturation increases all colors globally and I often find it too blunt of a tool and rarely use it.)
- Vignettes. As a final touch, almost always done at my last step, I often add a light vignette to an image to draw the eye back towards the center by darkening the edges. This is accomplished via the highlight priority tool and I frequently set it in the range of -10 to -20.
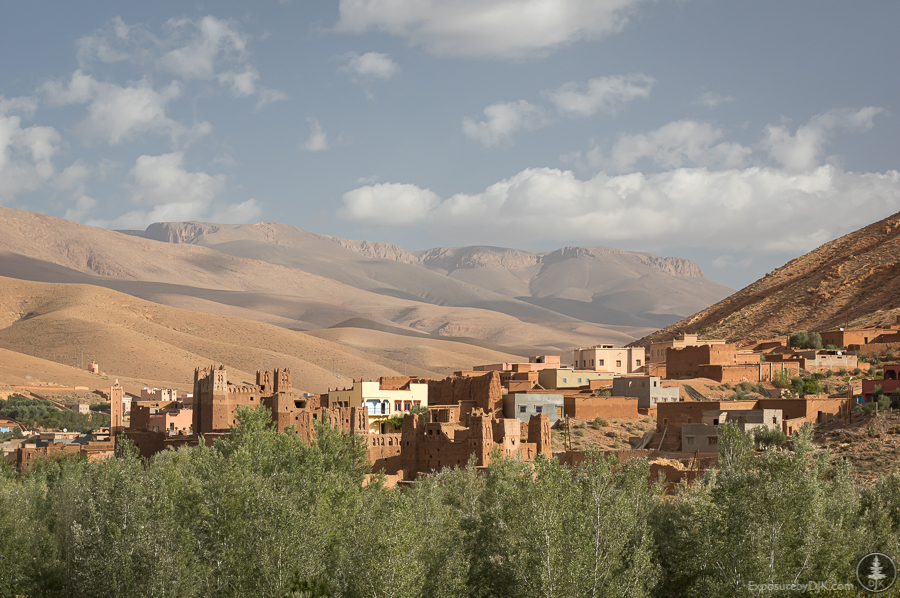
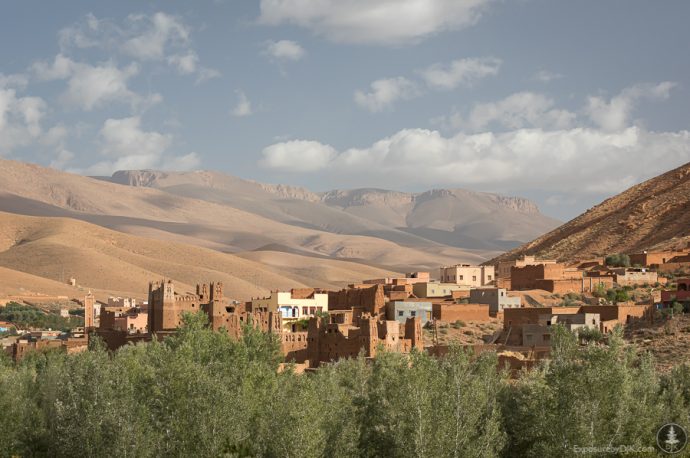
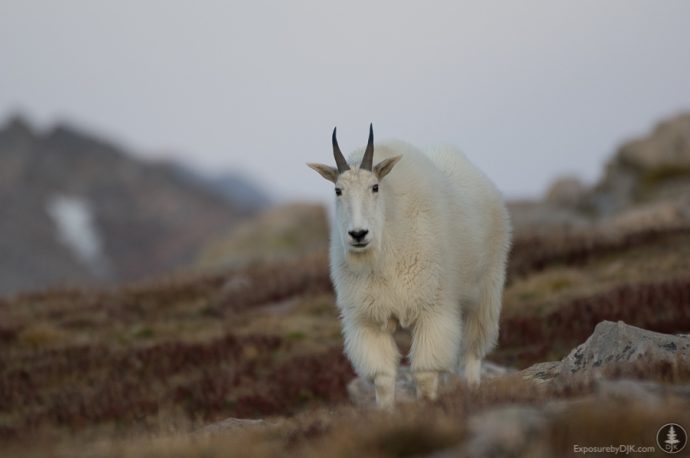
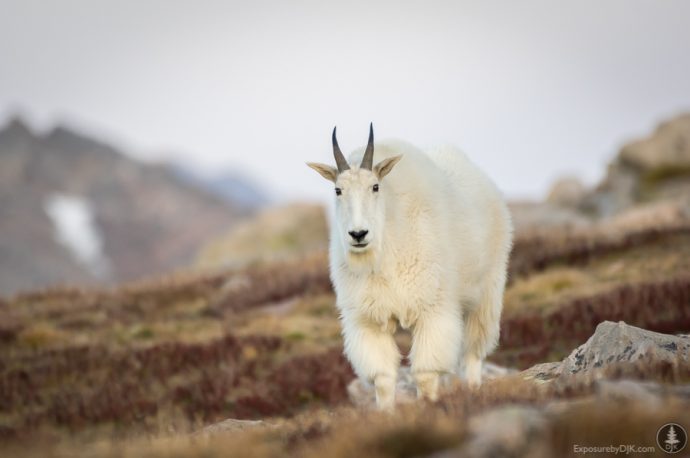
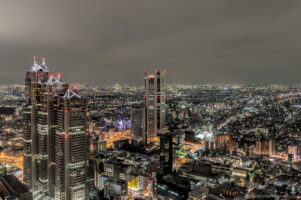
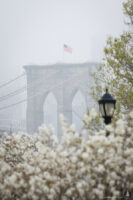
Examples
So what does all of this look like in practice? Here are some before and after photos that use the above editing process. As you can hopefully see, these aren’t significant edits, but rather subtle adjustments to the photo.
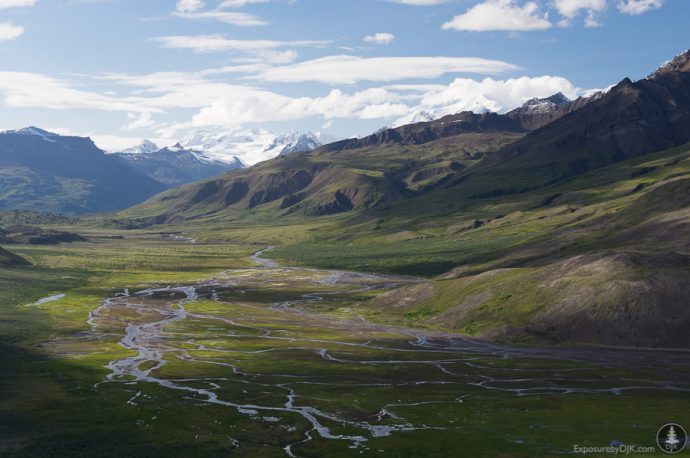
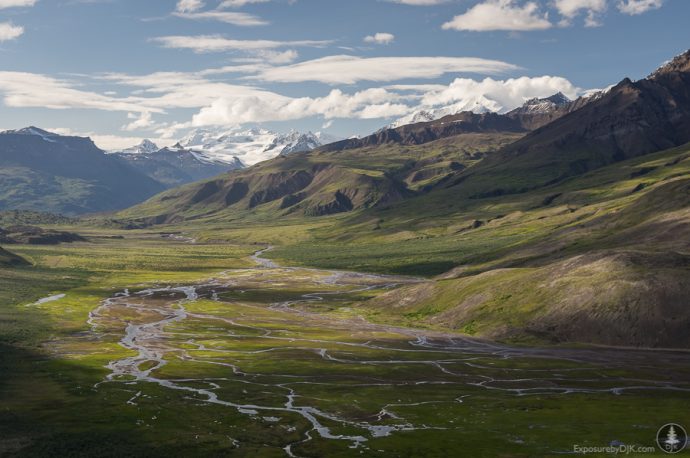
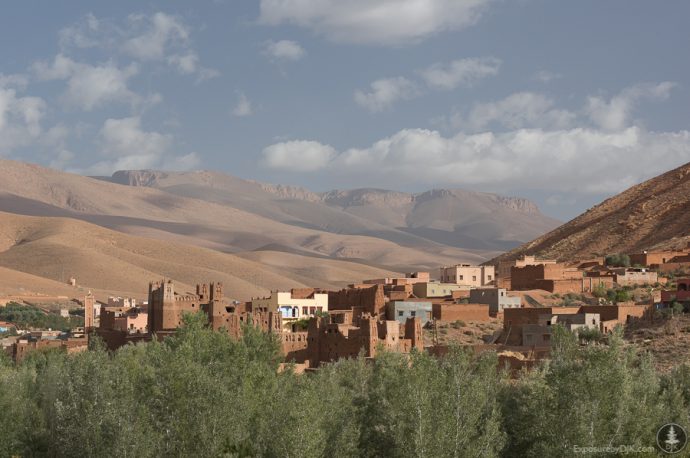
There you go! While each edit discussed here is worthy of its own blog post, hopefully that gives you an idea of my editing process. Each photo is unique, but more often than not I find these edits are my starting points and then I make further adjustments from there.
Stay on top of my recent photos and blog posts by signing up for my newsletter. Follow on Instagram @exposurebydjk.
Pingback: Photographing into the sun? Do this to remove lens flare - David J Kennedy Photography