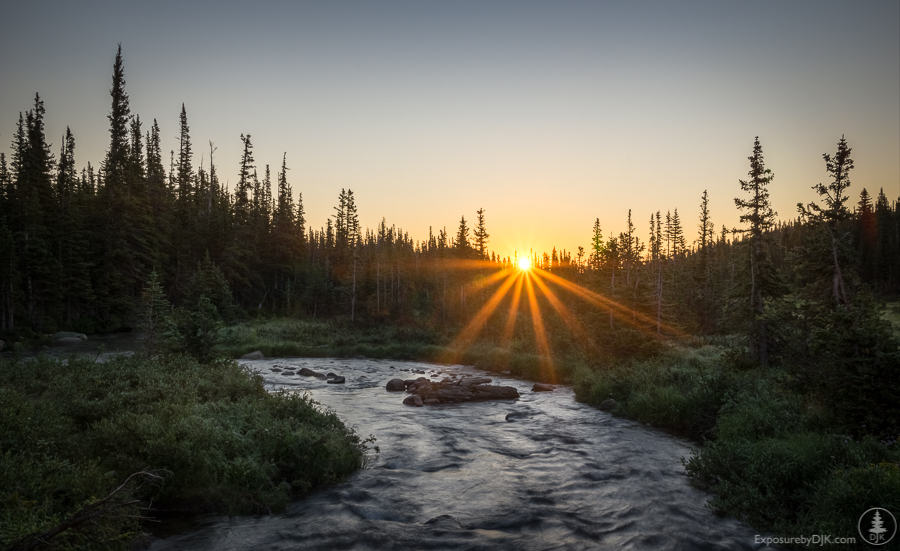
Including the sun in your photograph can provide a dramatic focal point to draw the viewer’s eye, but capturing and processing a pleasing photo takes more than a simple snapshot.
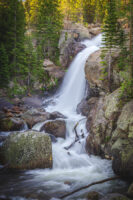
The photo I’m working with here was captured on a morning outing in which I was hoping for a colorful sunrise on a mountain lake, but the skies were completely clear and there was little color to be had. However, I turned around and had a nice view with the creek draining out of the lake so instead set up and waited for the sun to break the horizon.
There were two key challenges with making this photo while photographing directly towards the sun:
- Achieving proper exposure (the sun/sky isn’t too bright and the landscape isn’t too dark)
- Lens flare as a result of a strong light source entering the lens
Here’s how to overcome both of them.
Achieving Proper Exposure via HDR
You’ve probably heard of HDR before and you’ve almost certainly seen images created with this method (sometimes it’s painfully obvious). In short, HDR stands for High Dynamic Range and is used when the range of light in a scene is greater than the camera can capture in single photo. Camera sensors are incredible today, but even the best ones cannot always capture details in the brightest and darkest parts of the scene simultaneously. Instead, you take a series of images (3 to 5 normally) with different exposures that capture details in the various parts of the scene. Some will show details in the shadows while the others will show details in the highlights. This is so common that many cameras have built in functions to take the series of photos for you and some cameras, including cell phones now, will auto-combine them into a single photo. I like to control that processing steps so I combine them later in Lightroom or Photoshop.
For these scene, I took the following 5 images:

Notice the images on the left are very dark with good detail and color in the sky while the images on the right are too bright in they sky, but reveal good detail in the foreground.
These were also shot at a small aperture (f/16 in this case) which not only provides a lot of depth of field (i.e. how much of the image is in focus), but when shooting bright light sources like the sun or a streetlamp creates that starburst effect with the rays shooting outward.
After combining the images with Lightroom’s HDR function and some basic editing, I had the following photo:
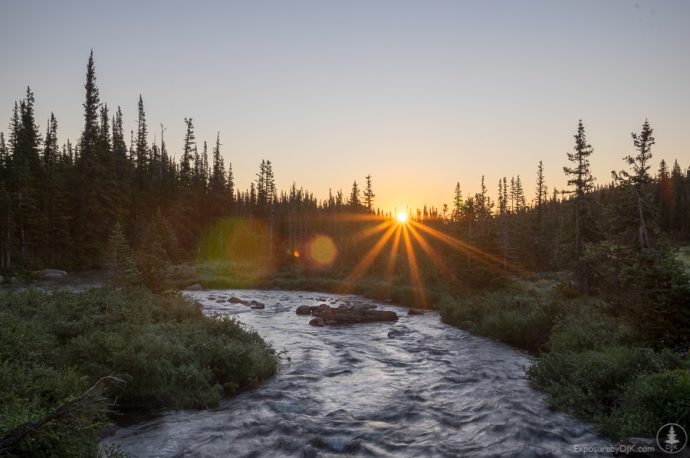
Not bad, but the lens flare is excessive in my opinion. A little is reasonable, and sometimes can even add to the photo, but when it’s this pronounced it draws the eye away too much (our eyes are drawn to bright spots as well as spot color in photographs).
Countering the Lens Flare
In some cases, you can use various tools in Lightroom (spot removal tool) or Photoshop (e.g., patch tool, content aware fill, and others) to remove the lensflare. This works best when it’s on a clean, simple background like a sky. But when the flare overlaps something like a tree, this gets increasingly hard to do.
When that is the case, the best option is to take an additional set of photos in the field without lens flare and then merge them together during processing.
Since lens flare is a result of a direct source of light entering the lens, all you have to do is block that light source. Doing so will create an image without the flare (or at least less, depending on how well you block it), but with some object also protruding from the edge of the frame.
For this second series of images, be sure to:
- Leave the camera locked down with the same composition as the first set of photos so the images align in post processing.
- Use your finger, a pencil, or similar object to block the sun. Do so from the top of the photo usually so you’re not covering up part of the scene you will want to remove lens flare from – again, fixing something like a sky is much easier.
- Use the exact same exposure settings between the two series of photos. If you’re camera is automatically determining exposure, when you block the sun you will change the camera’s metering meaning the second set will be different than the first. This can be accounted for during editing, but the better option is to keep it consistent in the field.
- And don’t delay in shooting this second series as the sun and light will constantly be changing.
So now you will have a series of photos that looks like this:

And when processed same as before (apply the same basic edits consistently to the two images) will look like this:
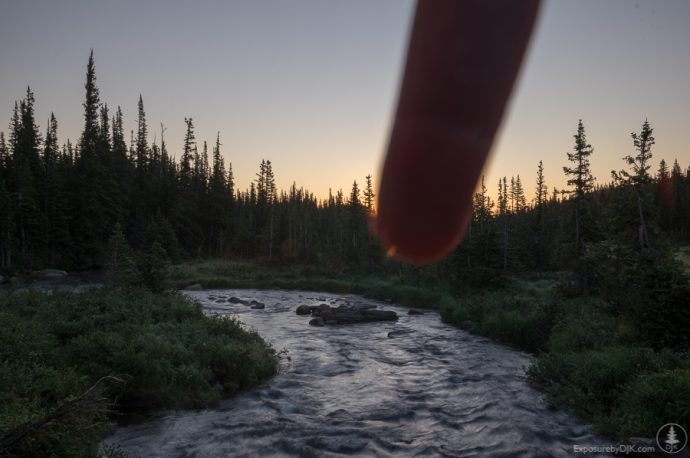
Ah, a beautiful photo with little to no lens flare (and a giant finger).
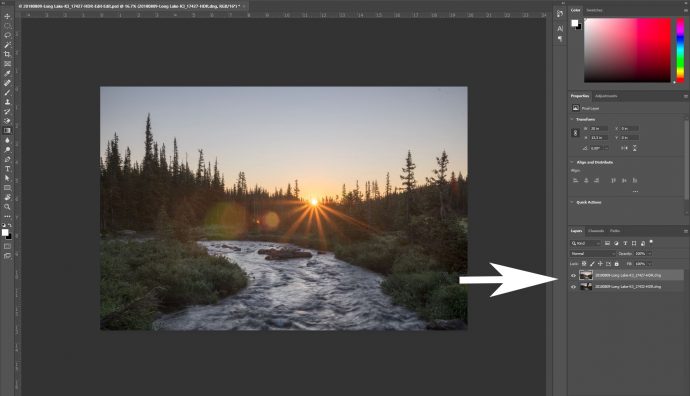
Now we have two images both with their own strengths – one with a great sun and one without lens flare. Time to combine them.
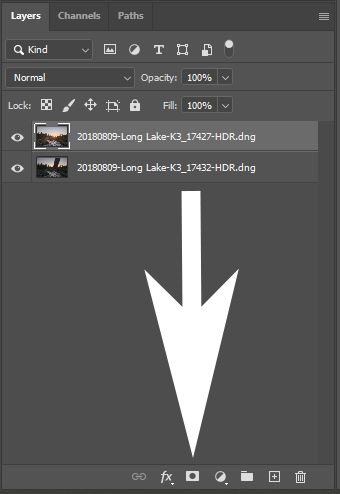
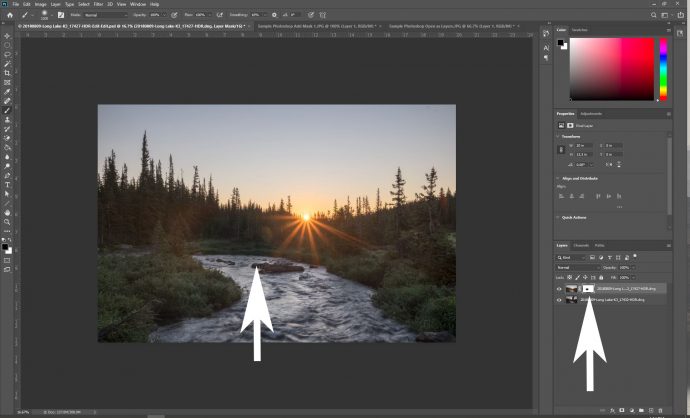
To do this part of the edit, we need to edit these two in Photoshop as this is a step too far for Lightroom’s abilities. Select both images, right click and click ‘Edit in…’ and then select ‘Open as layers in Photoshop.’ Each photo will be exported to Photoshop and opened in one file, stacked on top of each other.
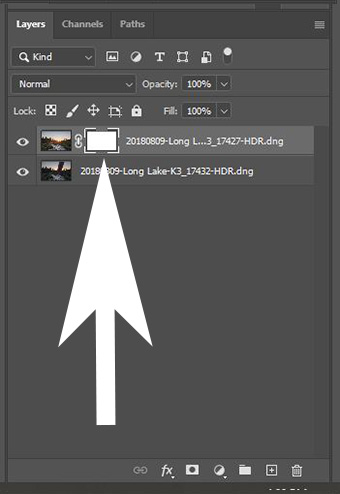
I suggest placing the the photo with the sun and flare on top if it isn’t already by dragging that layer on the right above the layer with the finger.
From there, we need to add a layer mask which allows us to ‘paint away’ the flare revealing the photo below it that doesn’t have the flare.
While that mask is selected, click the brush tool on the left toolbar;
- Select black as your color
- Set hardness to 0% in its settings at top (this is the fade of the brush so it doesn’t create a hard edge)
- Set flow to 100%
- Set opacity anywhere from 50-100% to start (with a lower opacity you’ll just have to pass over it more to reveal more of the photo underneath, which is good when you want to dial in the effect slowly)
Then with the mask still selected, paint over the lens flare you want to remove. This will reveal the photo below with no lens flare. The mask on the right will show the area you have masked by turning black.
Do too much and accidentally reveal the finger? Simply switch the brush color back to white and paint back over it to again hide the lower layer.
Finally, save the image which will re-import the new file back into Lightroom. You can still make any final edits in Lightroom. For this one, I darkened the edge of the frame just a little to draw the eye back towards the center.
Here is the final photo:

This post easily could been a half-dozen posts covering each step individually – HDR, masks, etc. – but hopefully this gives you a good idea of what goes into creating such a photo. Step one is to get out and shoot so if you learned nothing else, hopefully you will have gained some strategies to try while in the field. You can always save public quarantine periods for mastering your processing skills :).
Sign up for my new newsletter here to never miss a post. Learn more and sign-up here.