Upcoming Wildlife Photography Course (DU)
Join me for an upcoming course that I'm teaching through DU's enrichment program.
Join me for an upcoming course that I'm teaching through DU's enrichment program.
A little late in posting this one (okay, very late), but better late than never. Last March we ventured to Bears Ears and its vicinity to camp, hike, and photograph.
We spent one evening in Monument Valley, which was just a short distance from our camping location at Goosenecks State Park. We then spent a couple days around Bears Ears including a night out at Natural Bridges National Monument.
The weather was not very cooperative, between recent snow and more rain during our trip, which prevented us from getting down some roads and on some trails. On the plus side, however, the crowds were nonexistent.
(more…)
These two countries may not often be considered a likely combo for a trip, but while looking at airfare options it quickly became a winning combo for us. On the airfare front, we redeemed points to fly QSuites on Qatar Airways meaning we had to fly through Doha. I had never visited the middle east and a short stop over in Doha seemed like a great first experience.
We spent about 2 days in Doha then flew back to Marrakech via Casablanca. From there, we explored the country in a counter-clockwise direction, first spending a few days in Marrakech, followed by Ouarzazate (with stops in between), Middle Atlas region, Dades Valley, Todga Gorge, High Atlas, Sahara desert, Fez, Volubilis, Chefchaouen (i.e. the Blue City), and finally Casablanca.
While we explored Marrakech and Casablanca on our own, we hired a guide through Desert Majesty for the rest of our adventure. Ali, our guide, was great and he certainly showed us more than we would have seen on our own. And having someone else drive and navigate allowed for more time to stare out the windows, not to mention less time getting lost. The whole experience with Desert Majesty was great and we wouldn’t hesitate to use them again.
(more…)
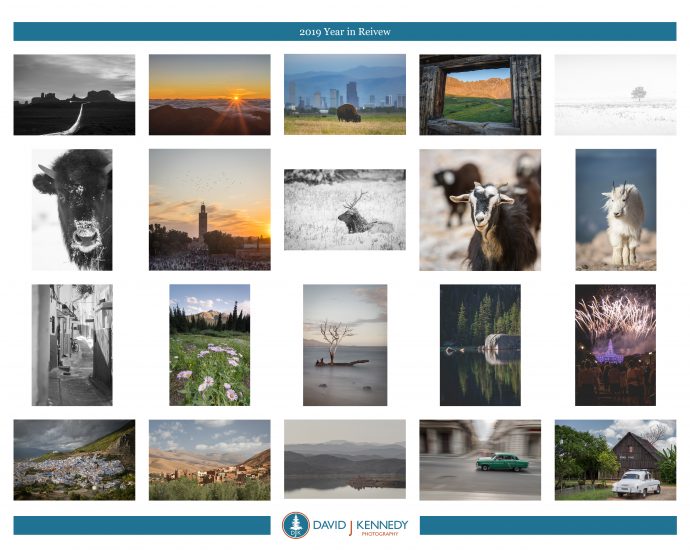
Another year, another 10,000 photos. Here are 20 of my favorite from 2019.

It’s always fun and a challenge to try and narrow down a year’s worth of photos into one set of twenty. Fun because it’s great to look back, see where I’ve been, and relive moments that seem so long ago but really were not. And a challenge because, well, see the note above about 10,000* images.
More than that, however, it’s a challenge to select 20 images that are not only eye-catching and technically sound, but to narrow it down to 20 that are also personally meaningful. Because in the end, that’s why I photograph in the first place.
Without further ado, here are my 20 from 2019.
(more…)National Parks are busier than never before. Here's how to find some solitude.
Cuba is rich in color, contrast, and history - often all at the same time - providing endless opportunities for photography.